Credits
Learn how to set up and use the credits system in your application
MkSaaS provides a flexible, modular credits system for rewarding users, enabling pay-per-use features, and supporting a variety of business models. This guide explains how to enable, configure, and use the credits system in your application.
Setup
To get started with the credits system, please follow the steps below to configure the necessary environment variables:
- Enable Credits in Configuration
- Open
src/config/website.tsxand locate thecreditssection. - Set
enableCredits: trueto enable the credits system. - Set
enablePackagesForFreePlan, only paid users can purchase extra credit packages by default, if set totrue, free users can also purchase credit packages. - Set
registerGiftCreditsto configure whether to give credits on registration, the number of credits to gift, and the expiration time.
- Open
export const websiteConfig = {
  // ...other config
  credits: {
    enableCredits: true, // Enable credits system
    enablePackagesForFreePlan: false, // disable free users to purchase credits
    registerGiftCredits: {
      enable: true, // Give credits on registration
      amount: 10, // Number of credits to gift
      expireDays: 30, // Optional: days before credits expire
    },
    packages: {
      basic: {
        id: 'basic',
        amount: 100,
        price: {
          priceId: process.env.NEXT_PUBLIC_STRIPE_PRICE_CREDITS_BASIC!,
          amount: 990,
          currency: 'USD',
        },
        popular: false,
      },
      // ...other packages
    },
  },
  // ...other config
}- Configure Credits in the Price Plan
- Open the file
src/config/website.tsxand locate theprice.planssection. - Set
creditsfield totrueto enable credits in this price plan. - Set
amountfield to100to set the number of credits in this price plan.
- Open the file
export const websiteConfig = {
  // ...other config
  price: {
    plans: {
      free: {
        id: 'free',
        // ...other config
        isFree: true,
        isLifetime: false,
        credits: {
          enable: true,
          amount: 50,
          expireDays: 30,
        },
      },
      // ...other plans
    },
  },
  // ...other config
}- Configure Credit Packages
- Define credit packages under
credits.packages, there are 4 credit packages by default. - Each package includes an
id,credits amount,price(Stripe priceId, see belowSet Stripe Price IDs), and optional fields likepopular,expireDays. - Currency is USD, currently only USD is supported.
- Define credit packages under
packages: {
  basic: {
    id: 'basic',
    amount: 100,
    price: {
      priceId: process.env.NEXT_PUBLIC_STRIPE_PRICE_CREDITS_BASIC!,
      amount: 990,
      currency: 'USD',
    },
    popular: false,
    expireDays: 30,
  },
  // ...
}- Set Stripe Price IDs
- Stripe price IDs are used to link credit packages to Stripe products and prices.
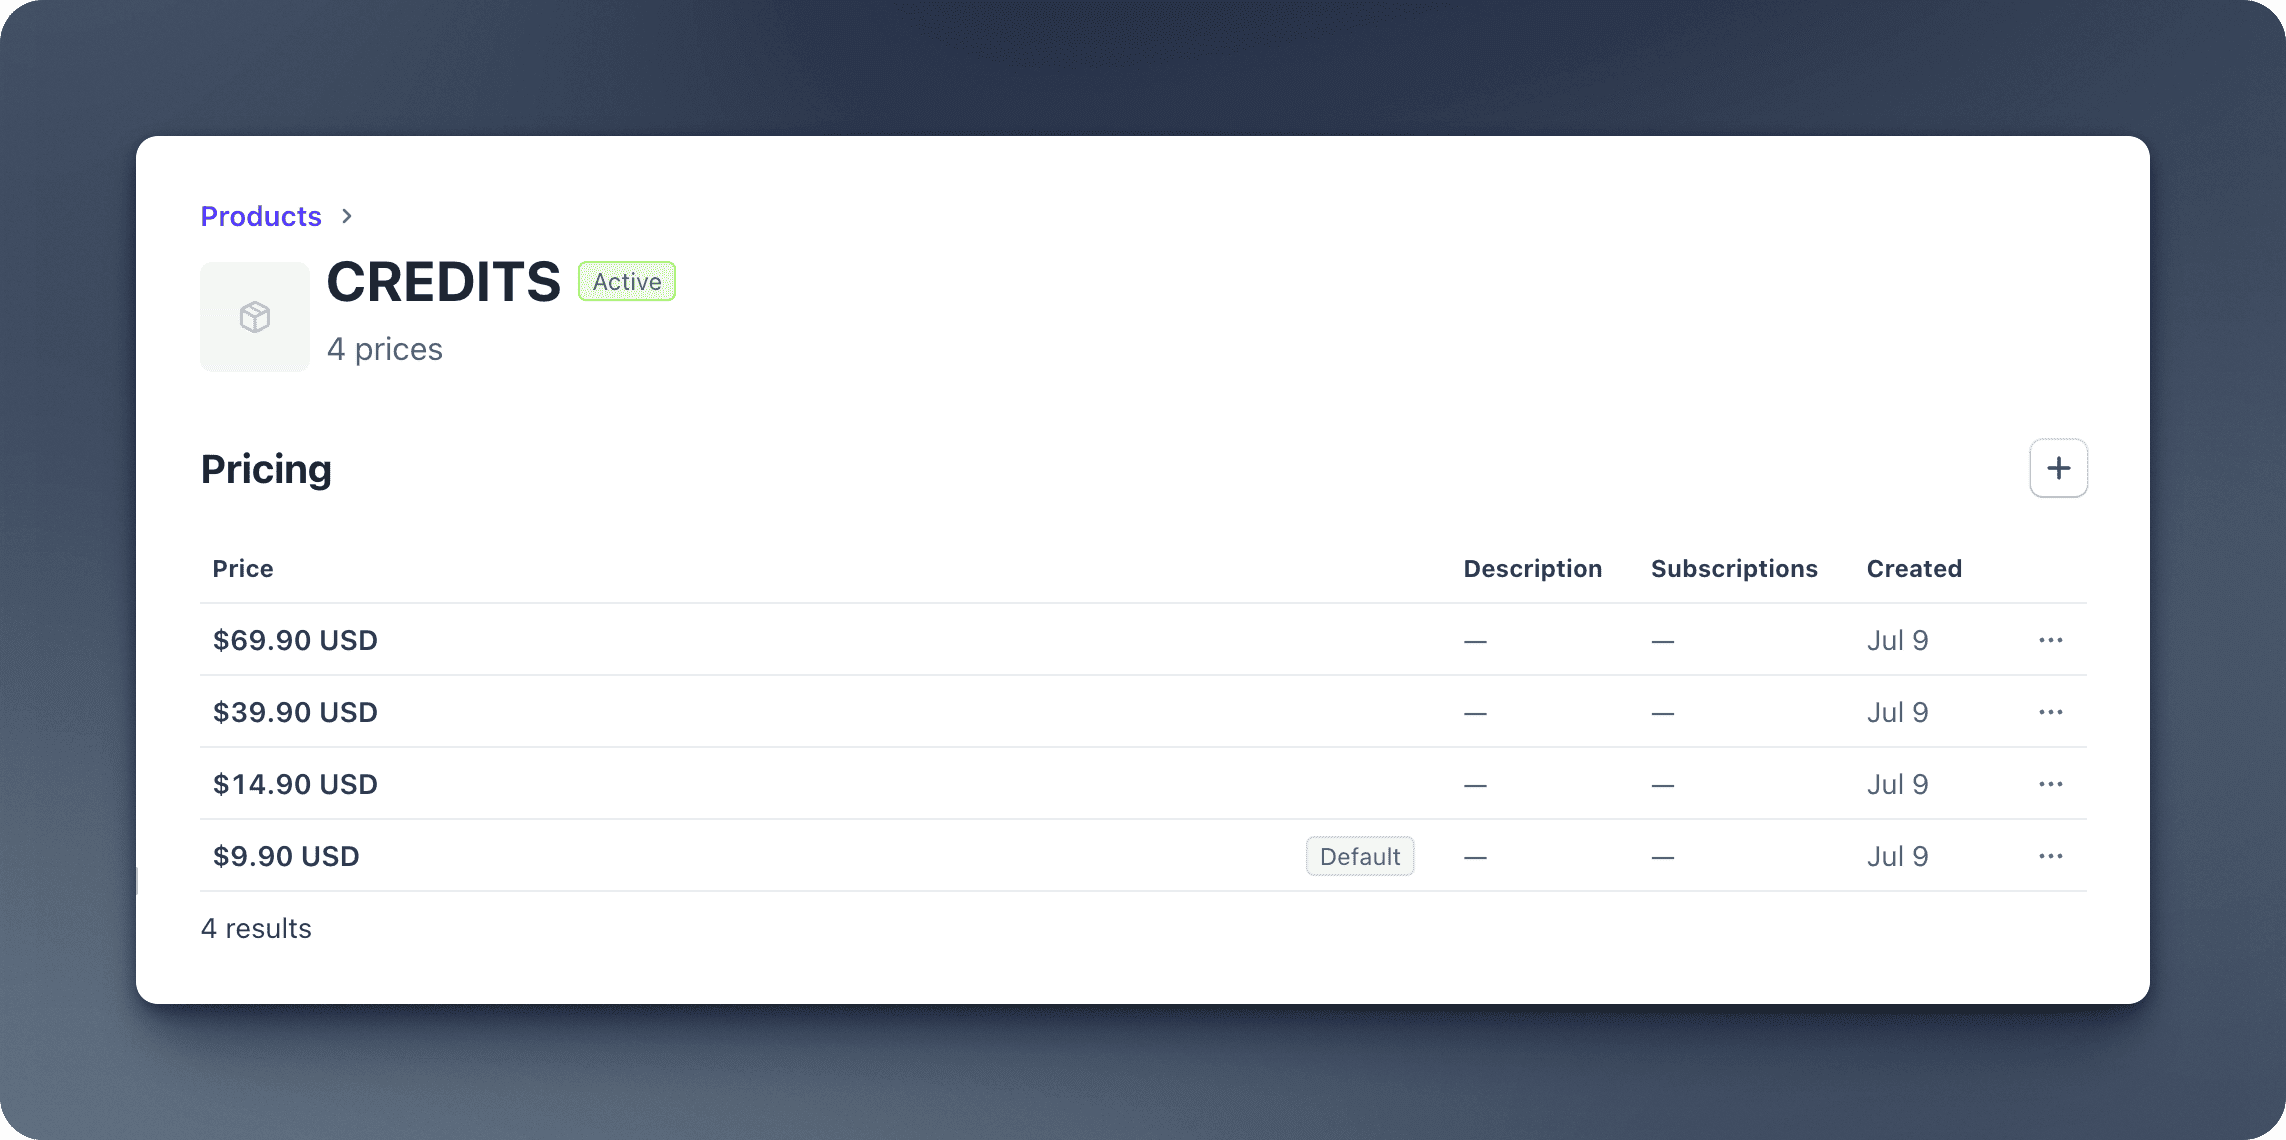
- Go to Stripe Dashboard, create a new product, and set prices for each credit package.
- Add Stripe price IDs for each credit package to
.envfile:
NEXT_PUBLIC_STRIPE_PRICE_CREDITS_BASIC=price_...
NEXT_PUBLIC_STRIPE_PRICE_CREDITS_STANDARD=price_...
NEXT_PUBLIC_STRIPE_PRICE_CREDITS_PREMIUM=price_...
NEXT_PUBLIC_STRIPE_PRICE_CREDITS_ENTERPRISE=price_...
- Set Up Translations for Credit Packages
- define the translated credit package names and descriptions in
src/config/credits-config.tsx. - The corresponding translation files are in
src/messages/en.json,src/messages/zh.json, etc.
- define the translated credit package names and descriptions in
export function getCreditPackages(): Record<string, CreditPackage> {
  const t = useTranslations('CreditPackages');
  const creditConfig = websiteConfig.credits;
  const packages: Record<string, CreditPackage> = {};

  // Add translated content to each package
  if (creditConfig.packages.basic) {
    packages.basic = {
      ...creditConfig.packages.basic,
      name: t('basic.name'),
      description: t('basic.description'),
    };
  }

  // Add other packages here...
  return packages;
}- Set Up Cron Jobs
Please refer to the Cron Jobs documentation to set up cron jobs for credit distribution and credit expiration.
If you are setting up the environment, now you can go back to the Environment Setup guide and continue. The rest of this guide can be read later.
Environment Setup
Set up environment variables
Credits System Structure
The credits system is modular and consists of the following components:
Core Features
- Purchase Credits: Users can buy credit packages if credits are not enough.
- Gift Credits on Registration: Optionally grant credits to new users.
- Credit Expiration: Set expiration days for credits per package or for gifts.
- Track Credit Balance: Query current user credits securely.
- Credit Transactions: View detailed transaction history (purchases, usage, expiration, etc.).
- Custom Packages: Define any number of packages with different amounts, prices, and properties.
- Internationalization: Support for translated package names and descriptions.
- Secure Server Actions: All credit operations are protected and validated.
- Zustand Store: Manage credits state globally in the app, and use it in React components via hooks.
Best Practices
- Enable Only When Needed: Set
enableCredits: trueonly if your business model requires credits. - Validate All Actions: Use provided server actions for all credit operations to ensure security and validation.
- Handle Expiration: Set
expireDaysfor packages or gifts if you want credits to expire.
Test
You can access the http://localhost:3000/test page to test the credits system, there is a button to consume 100 credits, and the credit balance will be displayed after consumption.
Video Tutorial
Next Steps
Now that you understand how to work with credits in MkSaaS, explore these related integrations:
 MkSaaS Docs