 MkSaaS-Dokumente
Stripe
Learn how to set up and use Stripe for handling payments and subscriptions
MkSaaS supports Stripe for payment management, handling both one-time payments and recurring subscriptions.
Setup
MkSaaS boilerplate uses three price plans by default: Free plan, Pro subscription plan (monthly/yearly), and Lifetime plan (one-time payment), follow these steps to set up Stripe integration:
Create Stripe Account
Create a Stripe account at stripe.com.
Get API Keys
Get your API keys from the Stripe dashboard:
- Go to the Stripe Dashboard >
Developers>API keys - Copy your Secret key (note: starts with
sk_test_for test mode orsk_live_for live mode) - Save it to your environment variables file as
STRIPE_SECRET_KEY
Set Up Webhook
Set up Webhook and get your Webhook Secret:
- Go to the Stripe Dashboard >
Developers>Webhooks - Click
Add endpoint - Enter Webhook URL:
https://YOUR-DOMAIN.com/api/webhooks/stripe - Select the events to listen for:
invoice.paidcheckout.session.completedcustomer.subscription.createdcustomer.subscription.updatedcustomer.subscription.deletedcharge.refunded
- Click
Revealto view Webhook Signing Secret (starts withwhsec_) - Save it to your environment variables file as
STRIPE_WEBHOOK_SECRET
You can find more information in Webhooks section if you want to test payment in development environment.
Create Products and Pricing Plans
Create products and pricing plans in Stripe:
- Go to the Stripe Dashboard >
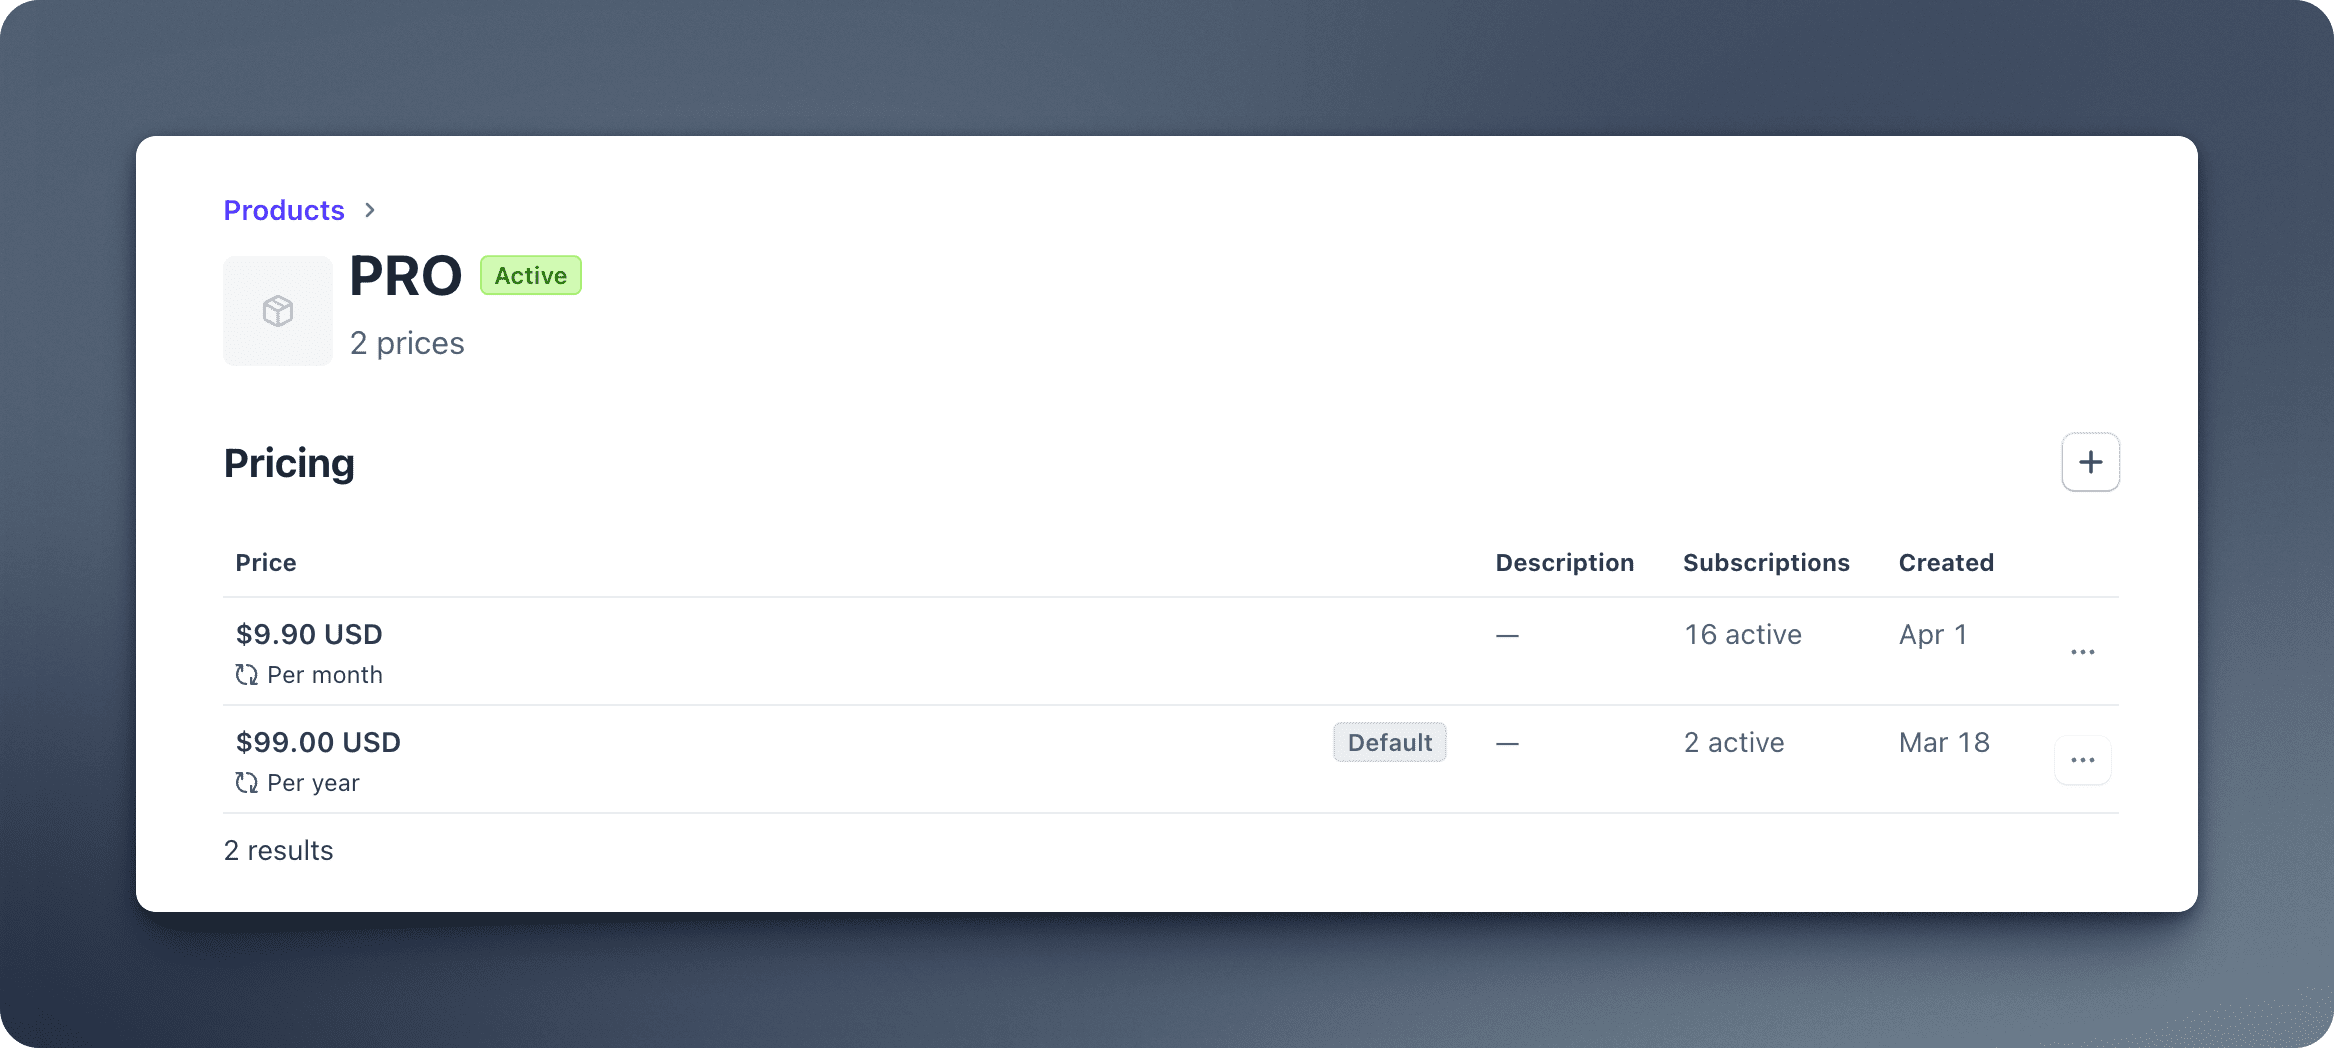
Product Catalog - Create Pro subscription product:
- Click
Add product - Name:
Pro Plan - Description:
Advanced features with subscription pricing - Add monthly price:
- Click
Add price - Price: $9.90 (currency select USD)
- Recurring: Monthly
- Save and copy the Price ID (starts with
price_), this will be used forNEXT_PUBLIC_STRIPE_PRICE_PRO_MONTHLY
- Click
- Add yearly price:
- Click
Add price - Price: $99.00 (currency select USD)
- Recurring: Yearly
- Save and copy the Price ID (starts with
price_), this will be used forNEXT_PUBLIC_STRIPE_PRICE_PRO_YEARLY
- Click
- Click
- Create Lifetime product:
- Click
Add product - Name:
Lifetime Plan - Description:
One-time payment for lifetime access - Add a price:
- Price: $199.00 (currency select USD)
- Type: One-off
- Save and copy the Price ID (starts with
price_), this will be used forNEXT_PUBLIC_STRIPE_PRICE_LIFETIME
- Click
Add Environment Variables
Add the following environment variables:
STRIPE_SECRET_KEY=sk_test_...
STRIPE_WEBHOOK_SECRET=whsec_...

# Price plans
NEXT_PUBLIC_STRIPE_PRICE_PRO_MONTHLY=price_...
NEXT_PUBLIC_STRIPE_PRICE_PRO_YEARLY=price_...
NEXT_PUBLIC_STRIPE_PRICE_LIFETIME=price_...
Set Up Customer Portal
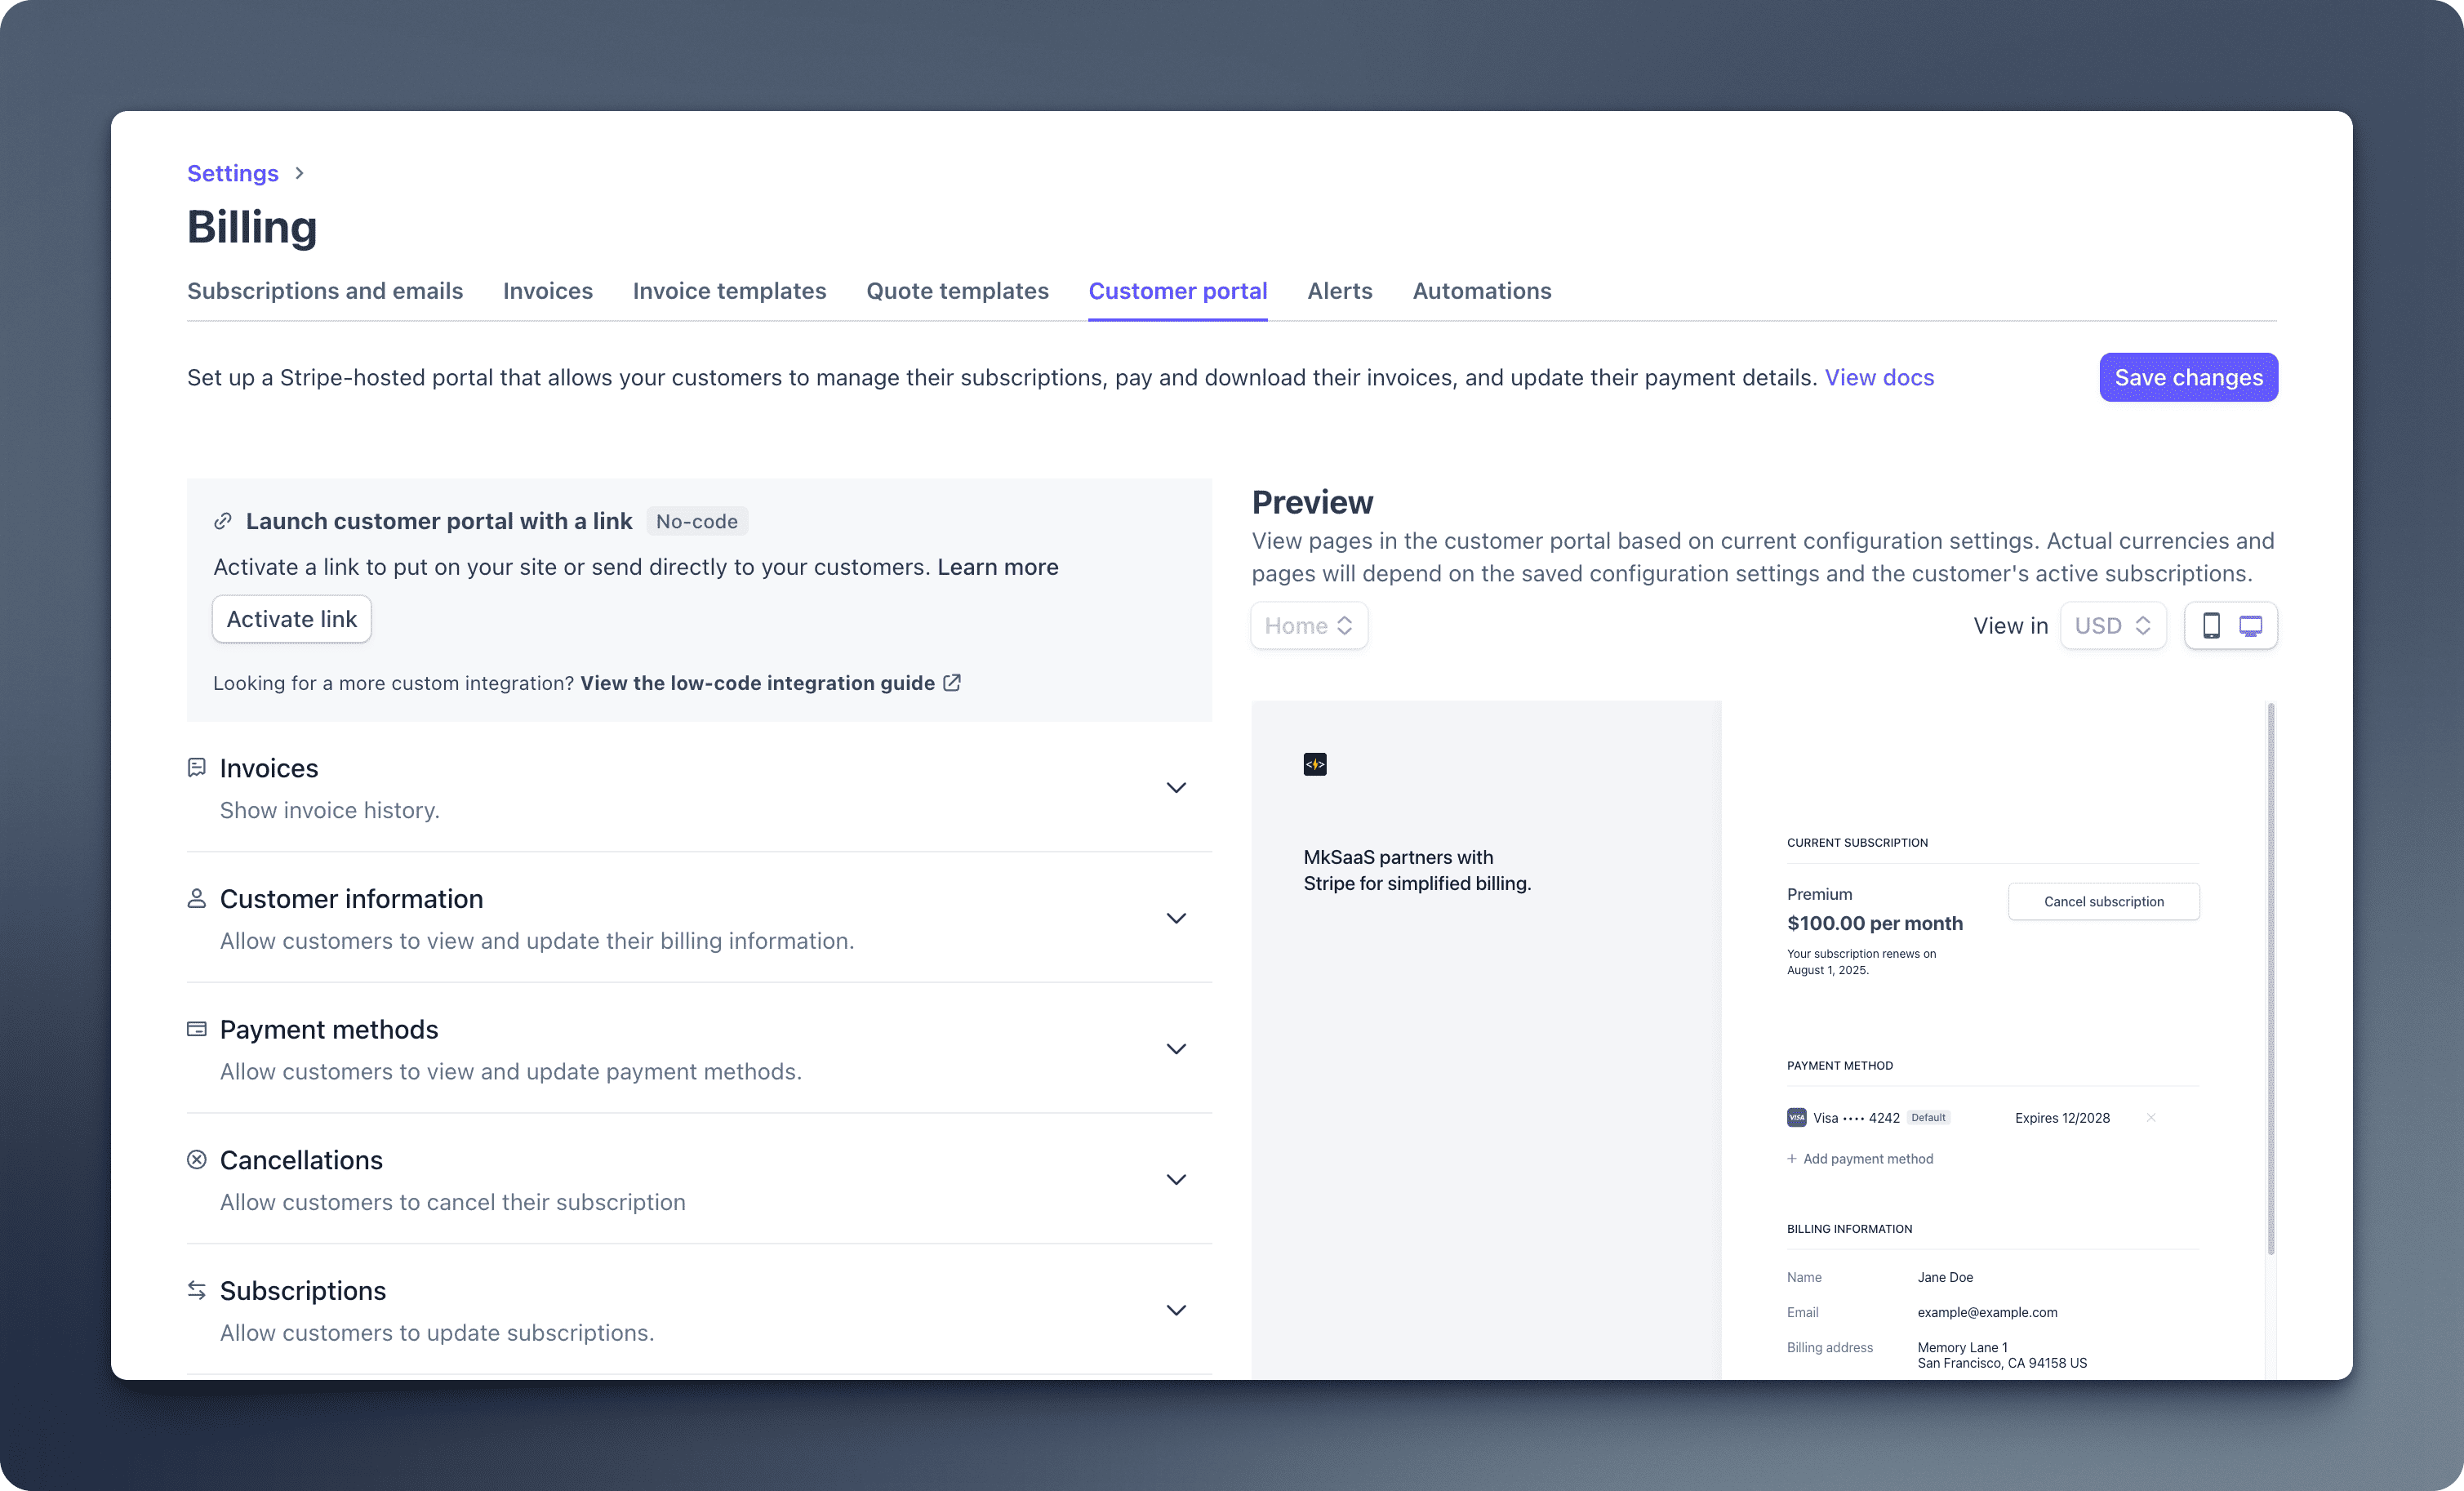
Set up the Stripe Customer Portal:
- Go to the Stripe Dashboard >
Settings>Billing>Customer Portal - Customize the content of the customer portal, for example, you can add a custom logo and title
- Click
Save changesto save the portal configuration
Update Website Configuration
Update the website.tsx file to use Stripe as the payment provider in the payment configuration, and configure your pricing plans in the price configuration:
import { PaymentTypes, PlanIntervals } from '@/payment/types';

export const websiteConfig = {
  // ...other config
  payment: {
    provider: 'stripe', // Payment provider to use
  },
  price: {
    plans: {
      free: {
        id: 'free',
        prices: [],
        isFree: true,
        isLifetime: false,
      },
      pro: {
        id: 'pro',
        prices: [
          {
            type: PaymentTypes.SUBSCRIPTION,
            priceId: process.env.NEXT_PUBLIC_STRIPE_PRICE_PRO_MONTHLY!,
            amount: 990,
            currency: 'USD',
            interval: PlanIntervals.MONTH,
          },
          {
            type: PaymentTypes.SUBSCRIPTION,
            priceId: process.env.NEXT_PUBLIC_STRIPE_PRICE_PRO_YEARLY!,
            amount: 9900,
            currency: 'USD',
            interval: PlanIntervals.YEAR,
          },
        ],
        isFree: false,
        isLifetime: false,
        popular: true,
      },
      lifetime: {
        id: 'lifetime',
        prices: [
          {
            type: PaymentTypes.ONE_TIME,
            priceId: process.env.NEXT_PUBLIC_STRIPE_PRICE_LIFETIME!,
            amount: 19900,
            currency: 'USD',
            allowPromotionCode: true,
          },
        ],
        isFree: false,
        isLifetime: true,
      },
    },
  },
  // ...other config
}
If you are setting up the environment, now you can go back to the Environment Setup guide and continue. The rest of this guide can be read later.
Environment Setup
Set up environment variables
Webhooks
Stripe Webhooks are essential for handling asynchronous events like successful payments and subscription updates.
Development
For local development, use the Stripe CLI to forward events to your local server:
Install the Stripe CLI using Stripe's
official instructions for your operating system, then log in to the same Test
Mode account used by STRIPE_SECRET_KEY:
Login to Stripe:
stripe loginForward events to your local server:
stripe listen \
  --skip-update \
  --events checkout.session.completed,customer.subscription.created,customer.subscription.updated,customer.subscription.deleted,invoice.paid,charge.refunded \
  --forward-to http://localhost:3000/api/webhooks/stripe
The Webhook secret is printed in the terminal. Copy it and add it to your environment variables file:
STRIPE_WEBHOOK_SECRET=whsec_...You can trigger test events using the Stripe CLI, or test events on the website:
stripe trigger invoice.paid
stripe trigger checkout.session.completed
stripe trigger customer.subscription.created
stripe trigger customer.subscription.updated
stripe trigger customer.subscription.deleted
stripe trigger charge.refunded
You can also run the real Stripe Test Mode flow included with the template:
pnpm e2e:stripeFor automated sandbox setup, server ports, environment-file precedence, and database prerequisites, see Automated Testing and tests/e2e/stripe/README.md in the template.
Payment Confirmation and Event Ordering
invoice.paid is the authority for a successful Stripe payment.
checkout.session.completed creates the local payment context, but does not
grant access by itself.
Stripe does not guarantee event order. If invoice.paid arrives first, MkSaaS
reconstructs the Checkout Session and creates the paid row during that delivery.
The /payment page then finds the row by Checkout Session ID and signed-in user.
This also supports a fully discounted Lifetime checkout, which has an Invoice
but no PaymentIntent.
Webhook Responses and Retries
| Result | HTTP status |
|---|---|
| Stripe is not the configured provider | 404 |
Missing payload or Stripe-Signature header | 400 |
| Invalid signature | 400 |
| Successfully processed or safely duplicated | 200 |
| Temporary Stripe API or database failure | 500 |
Temporary failures return 500 so Stripe can retry. Duplicate deliveries are
handled idempotently.
Production
- Go to the Stripe Dashboard > Developers > Webhooks
- Click
Add endpoint - Enter Webhook URL:
https://YOUR-DOMAIN.com/api/webhooks/stripe - Select the events to listen for:
invoice.paidcheckout.session.completedcustomer.subscription.createdcustomer.subscription.updatedcustomer.subscription.deletedcharge.refunded
- After creating, click
Revealto view your Webhook Signing Secret - Copy the Webhook secret (starts with
whsec_) and add it to your environment variables
UI Components
MkSaaS includes pre-built React components for handling payments:
Extending New Payment Providers
See Payment for the current provider interface, capability flags, and registry pattern.
Testing Cards
For testing Stripe integration, use Stripe's test mode and test credit cards:
- 4242 4242 4242 4242 - Successful payment
- 4000 0000 0000 3220 - 3D Secure authentication required
- 4000 0000 0000 9995 - Insufficient funds failure
You can find more information about Stripe test cards in the Stripe documentation.
Invoices
MkSaaS has already configured the invoice creation for one-time payments.
// Automatically create an invoice for the one-time payment
checkoutParams.invoice_creation = {
  enabled: true,
};
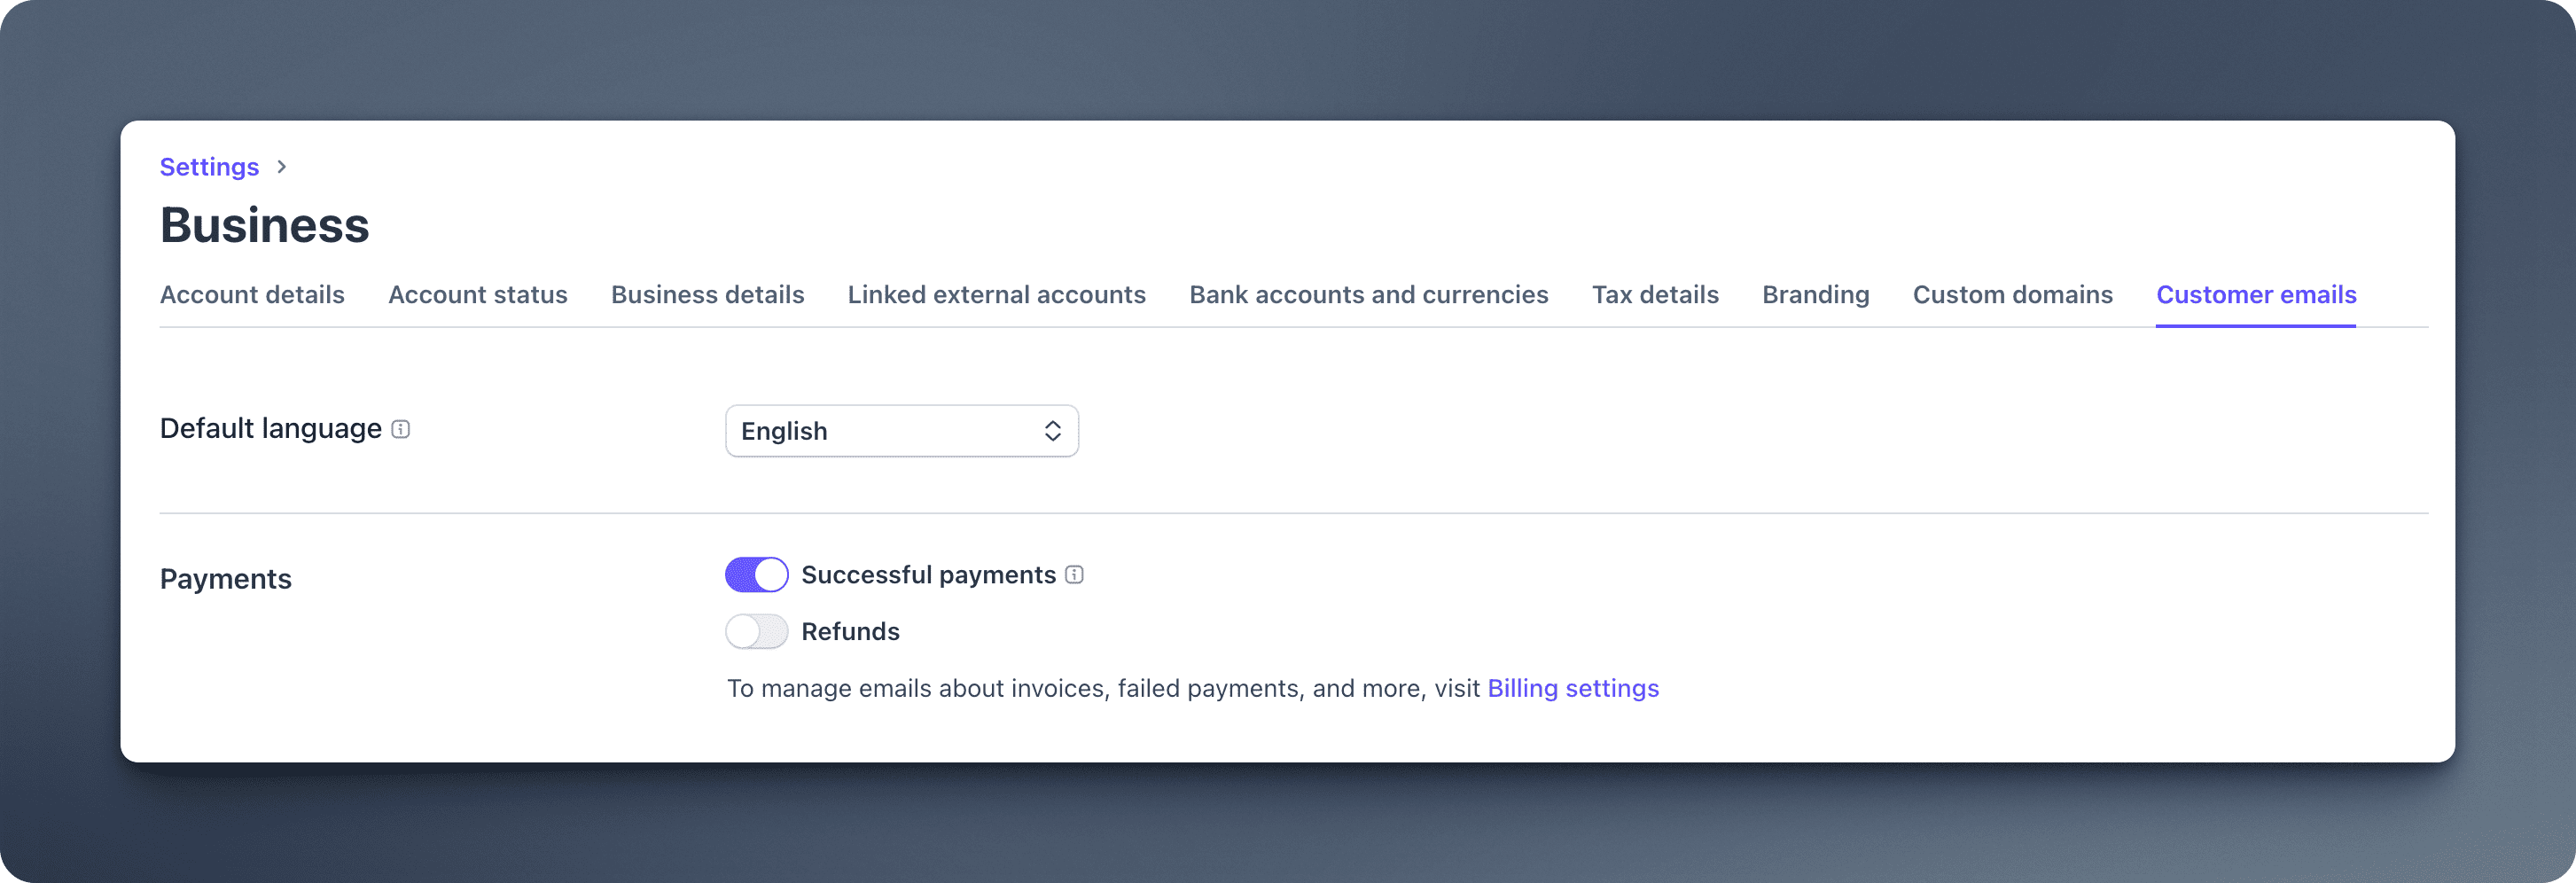
If you want to automatically send paid invoices, you can enable it in your Customer emails settings, under Email customers about, select Successful payments. After that, you can access the invoices in the Stripe Dashboard > Invoices.
A full refund for a Lifetime purchase revokes only the matching order and
marks it canceled. A partial refund keeps access. Keep charge.refunded
enabled so refund state reaches MkSaaS.
You can find more information about Automatically send paid invoices in the Stripe documentation.
Diagram
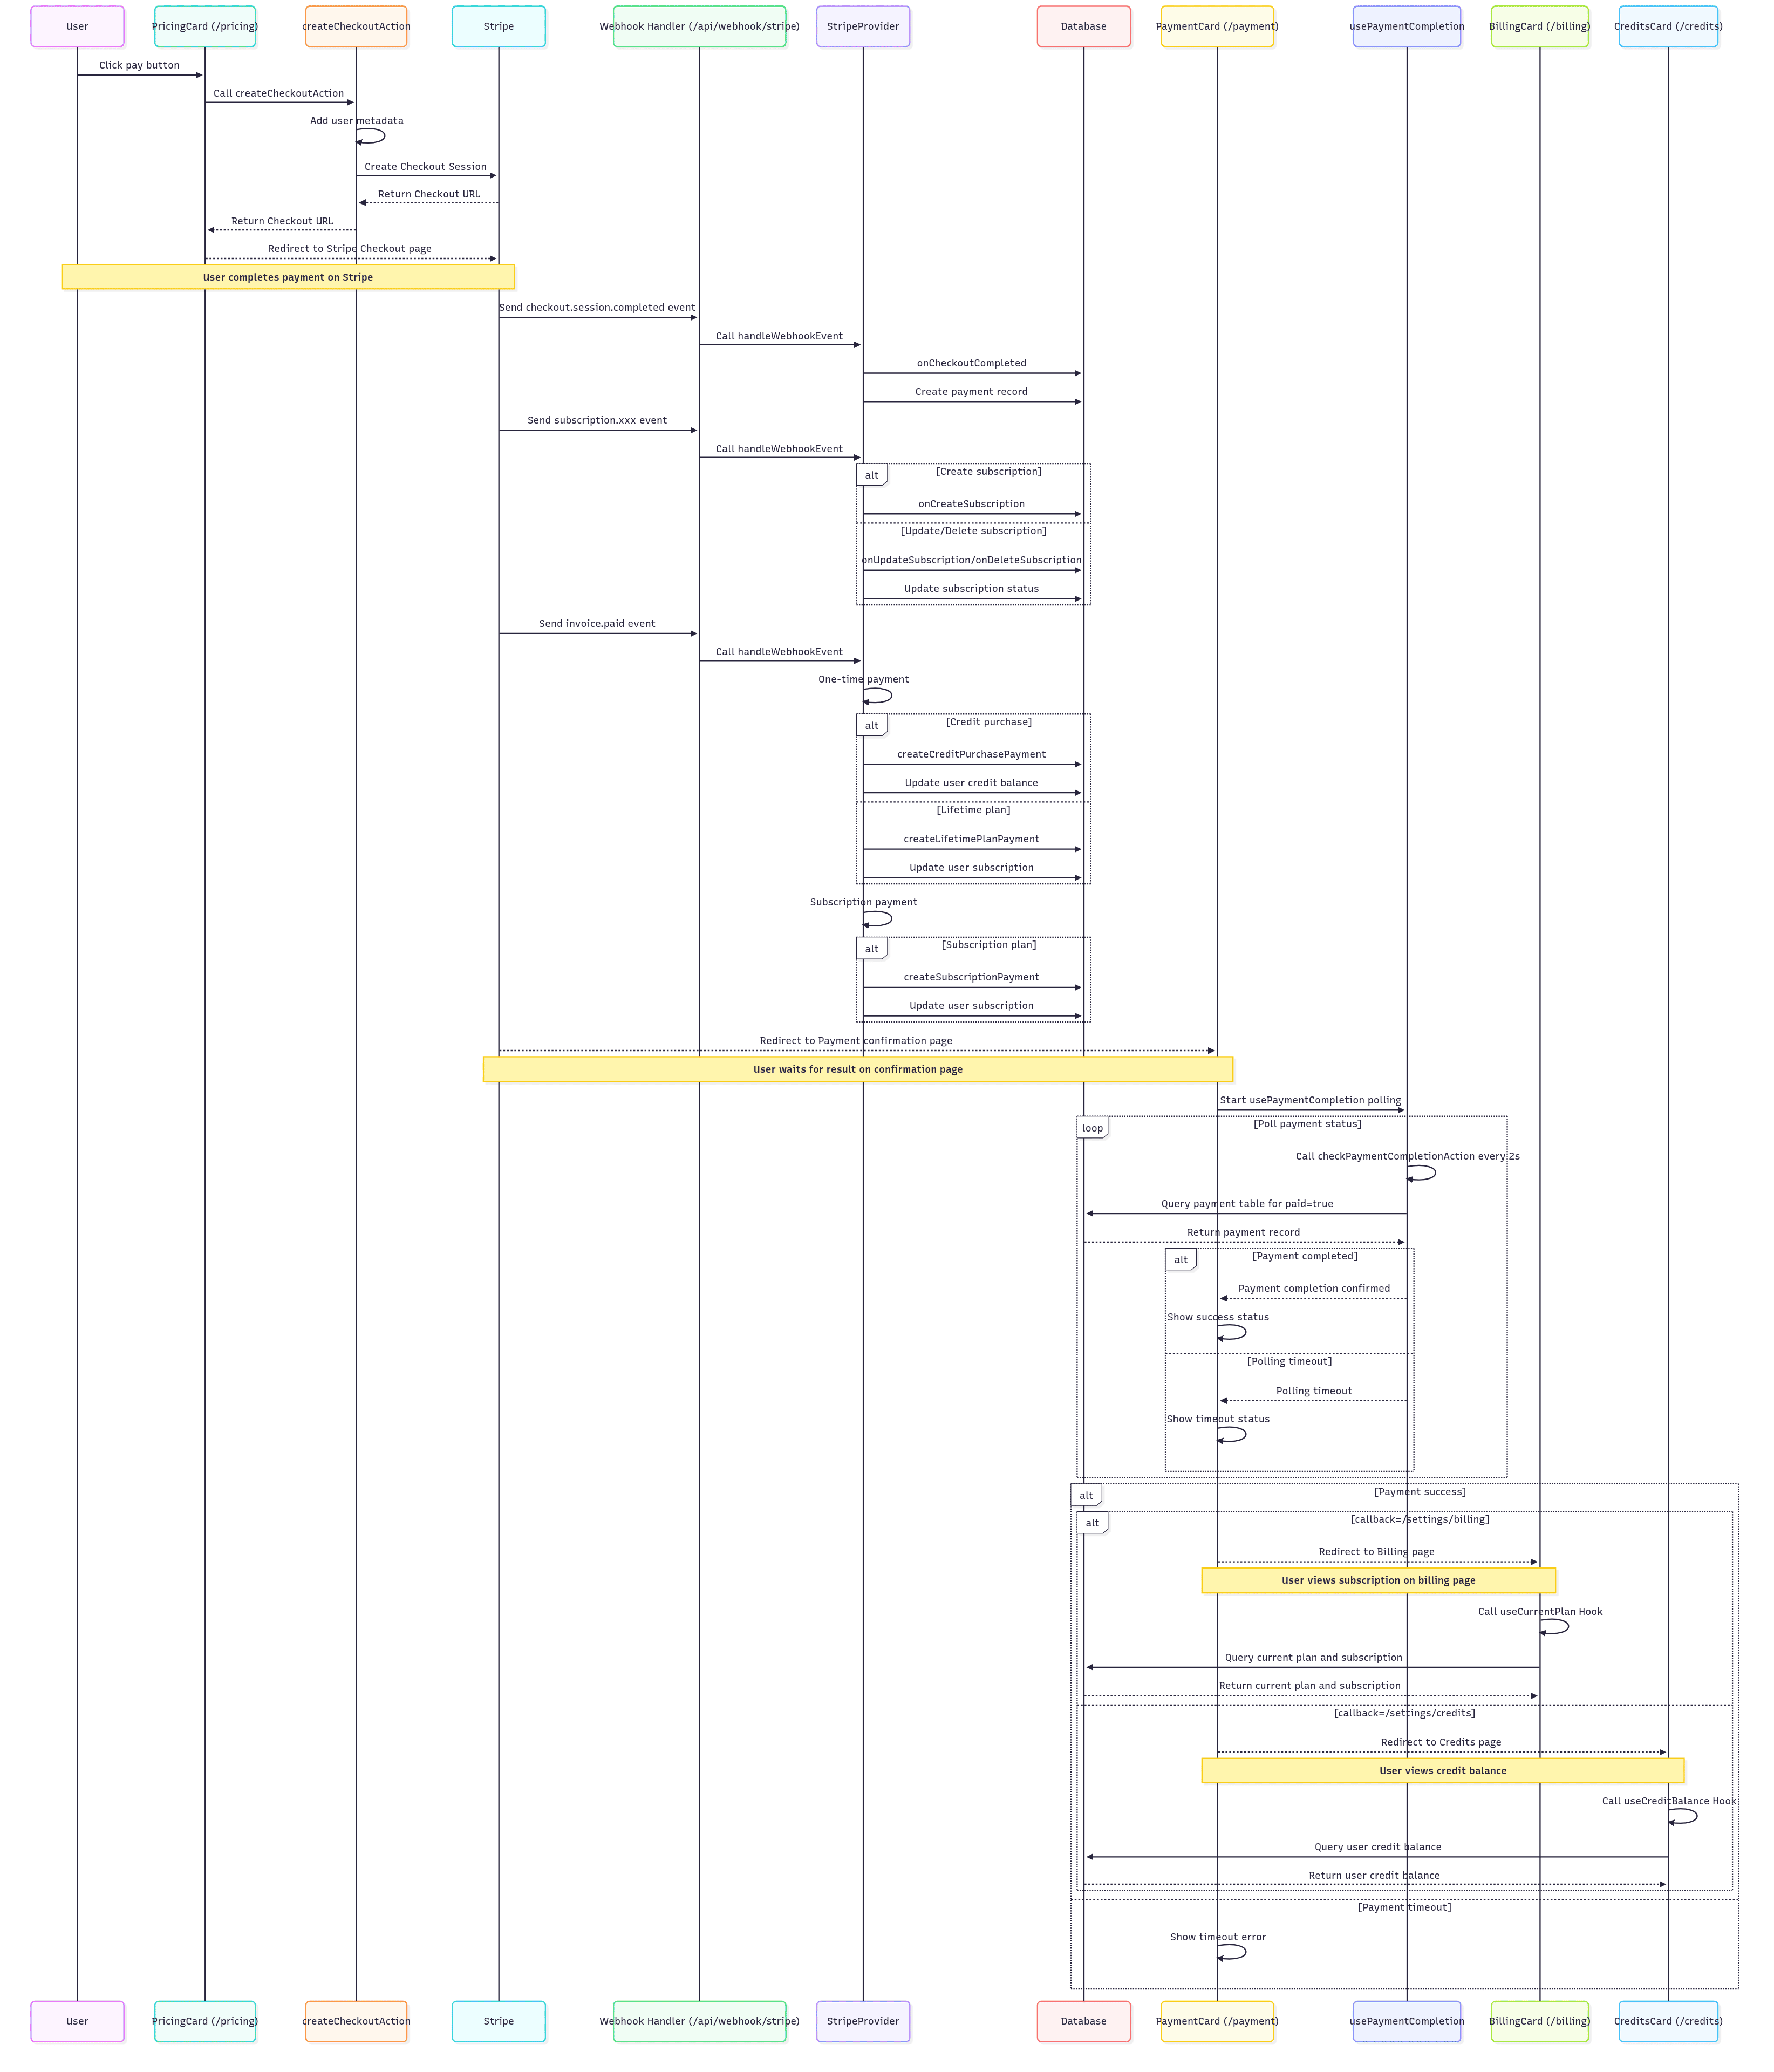
This is the diagram of the payment process, you can watch the video tutorial for more details.
FAQ
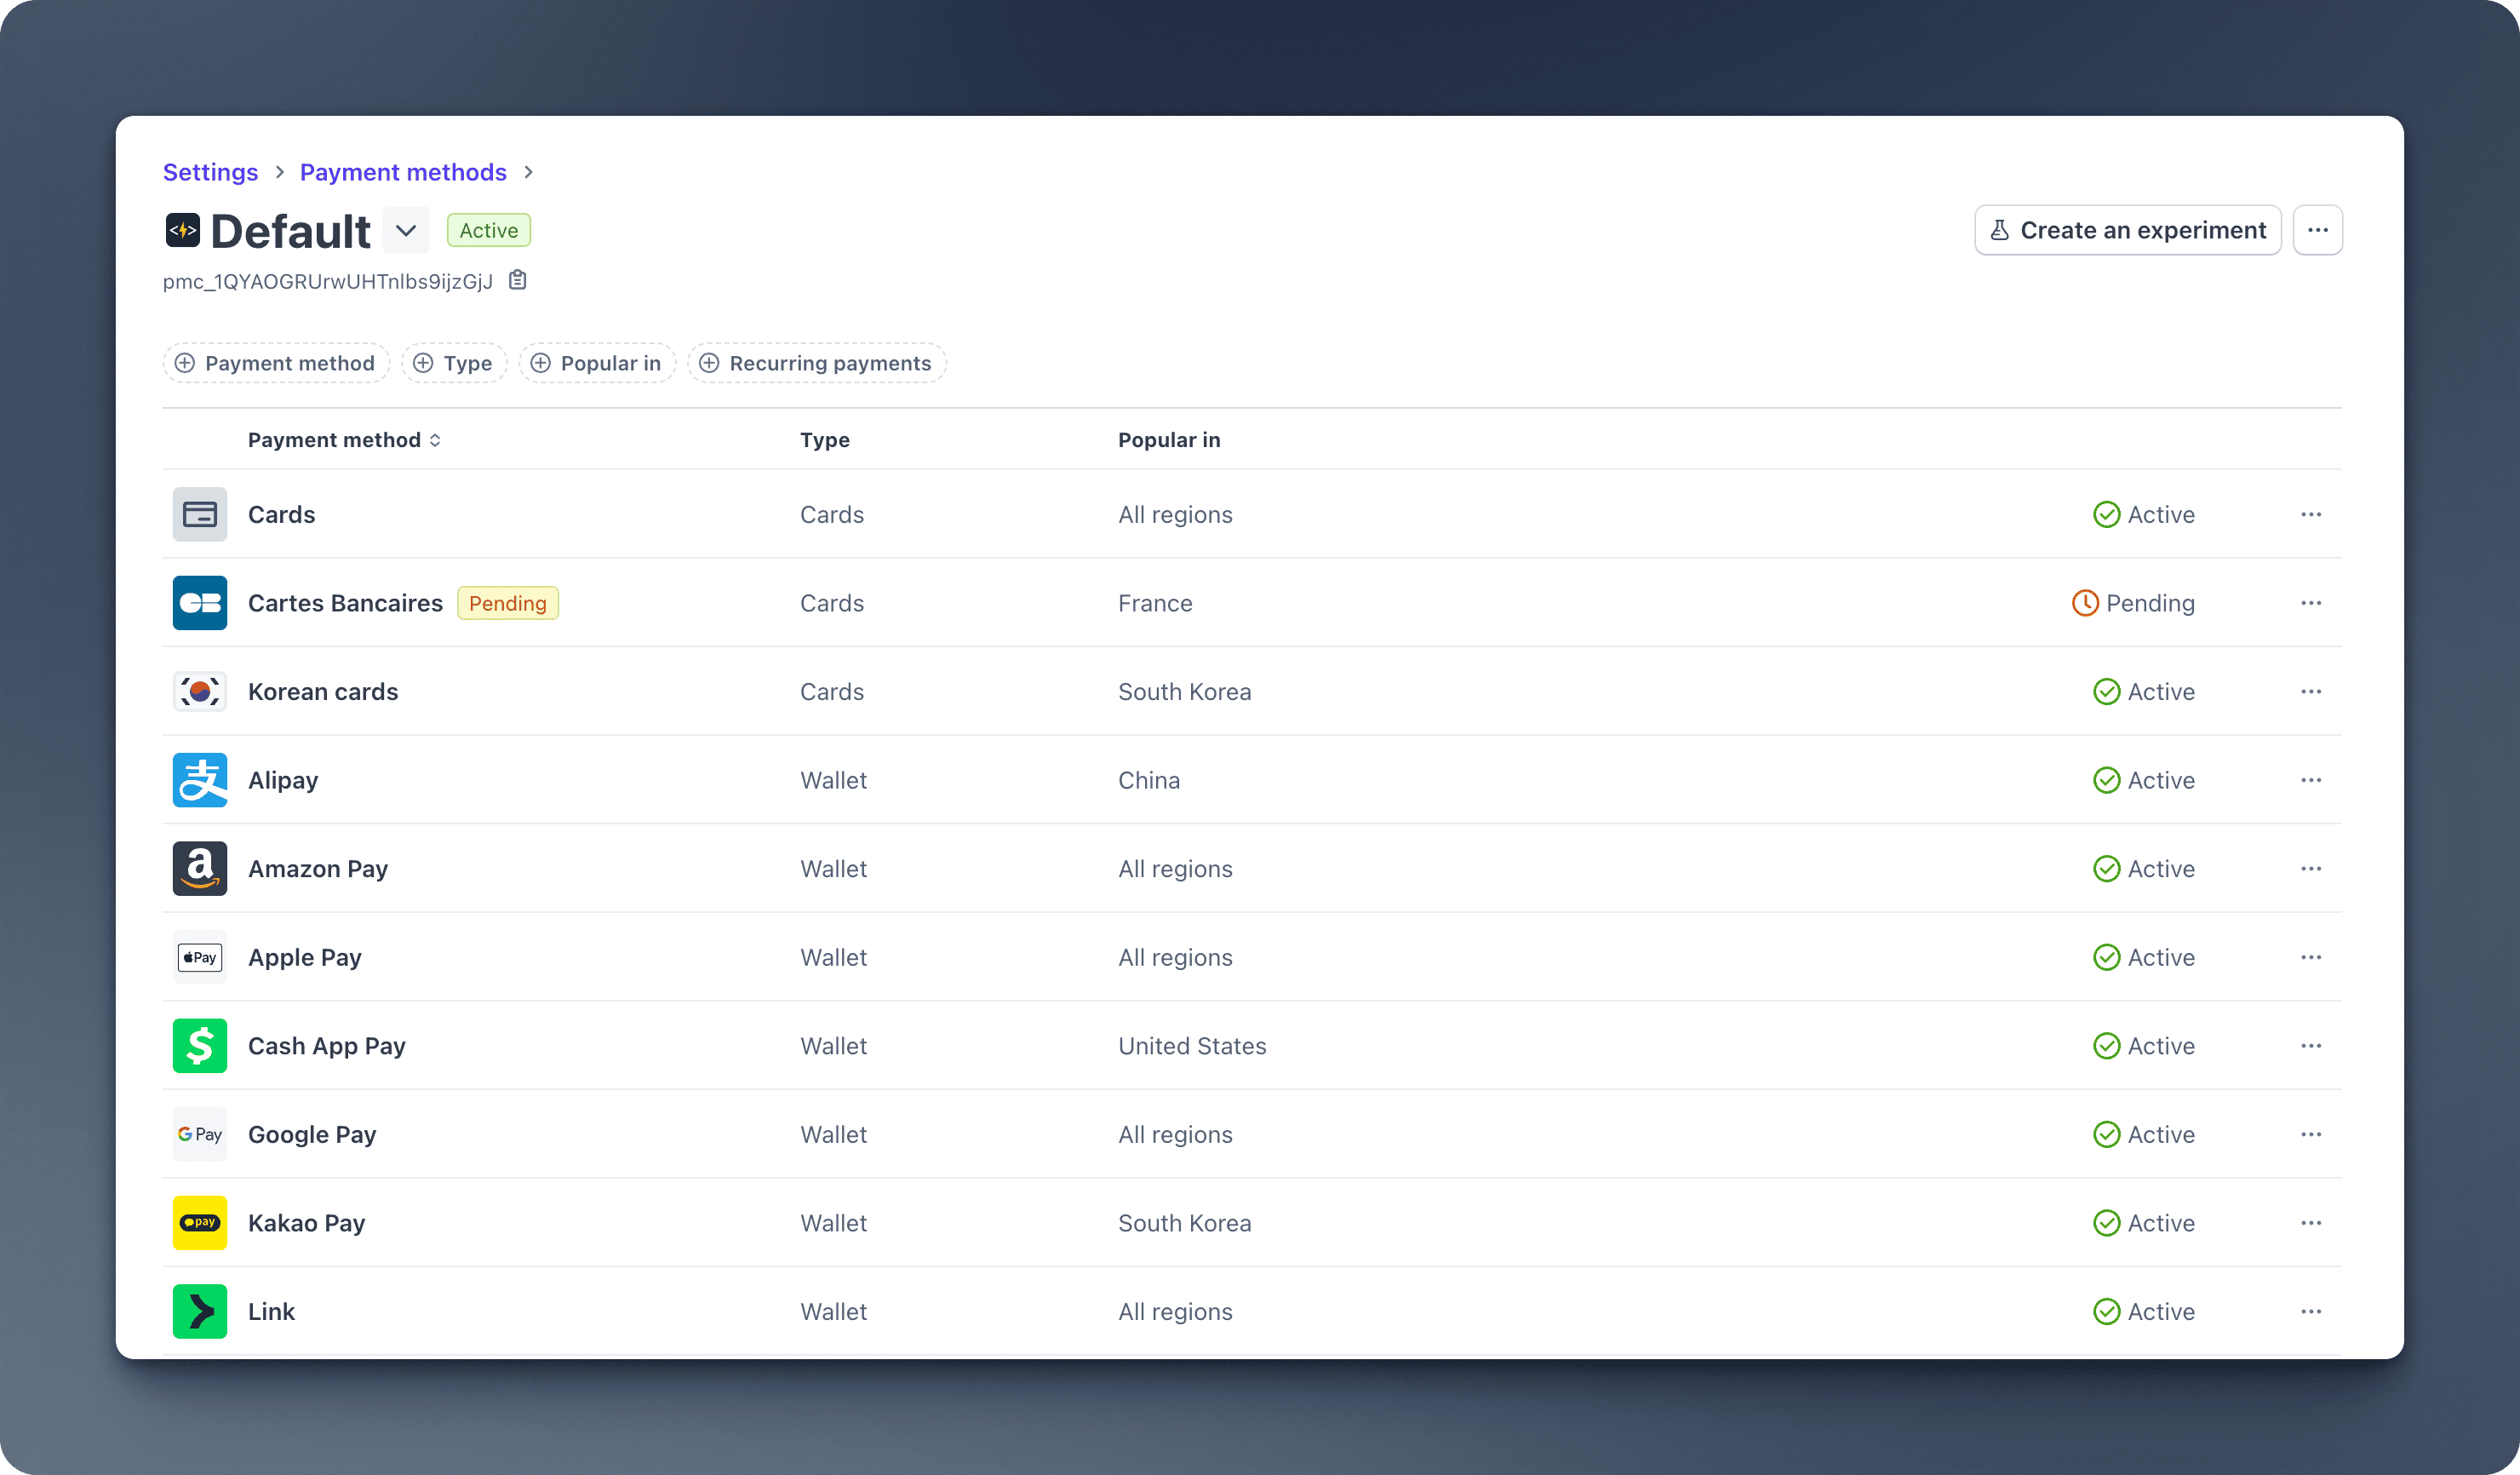
How to activate WeChatPay and Alipay?
You can activate WeChatPay and Alipay in the Stripe Dashboard > Settings > Payment methods. You can find more information about WeChat Pay and Alipay in the Stripe documentation.
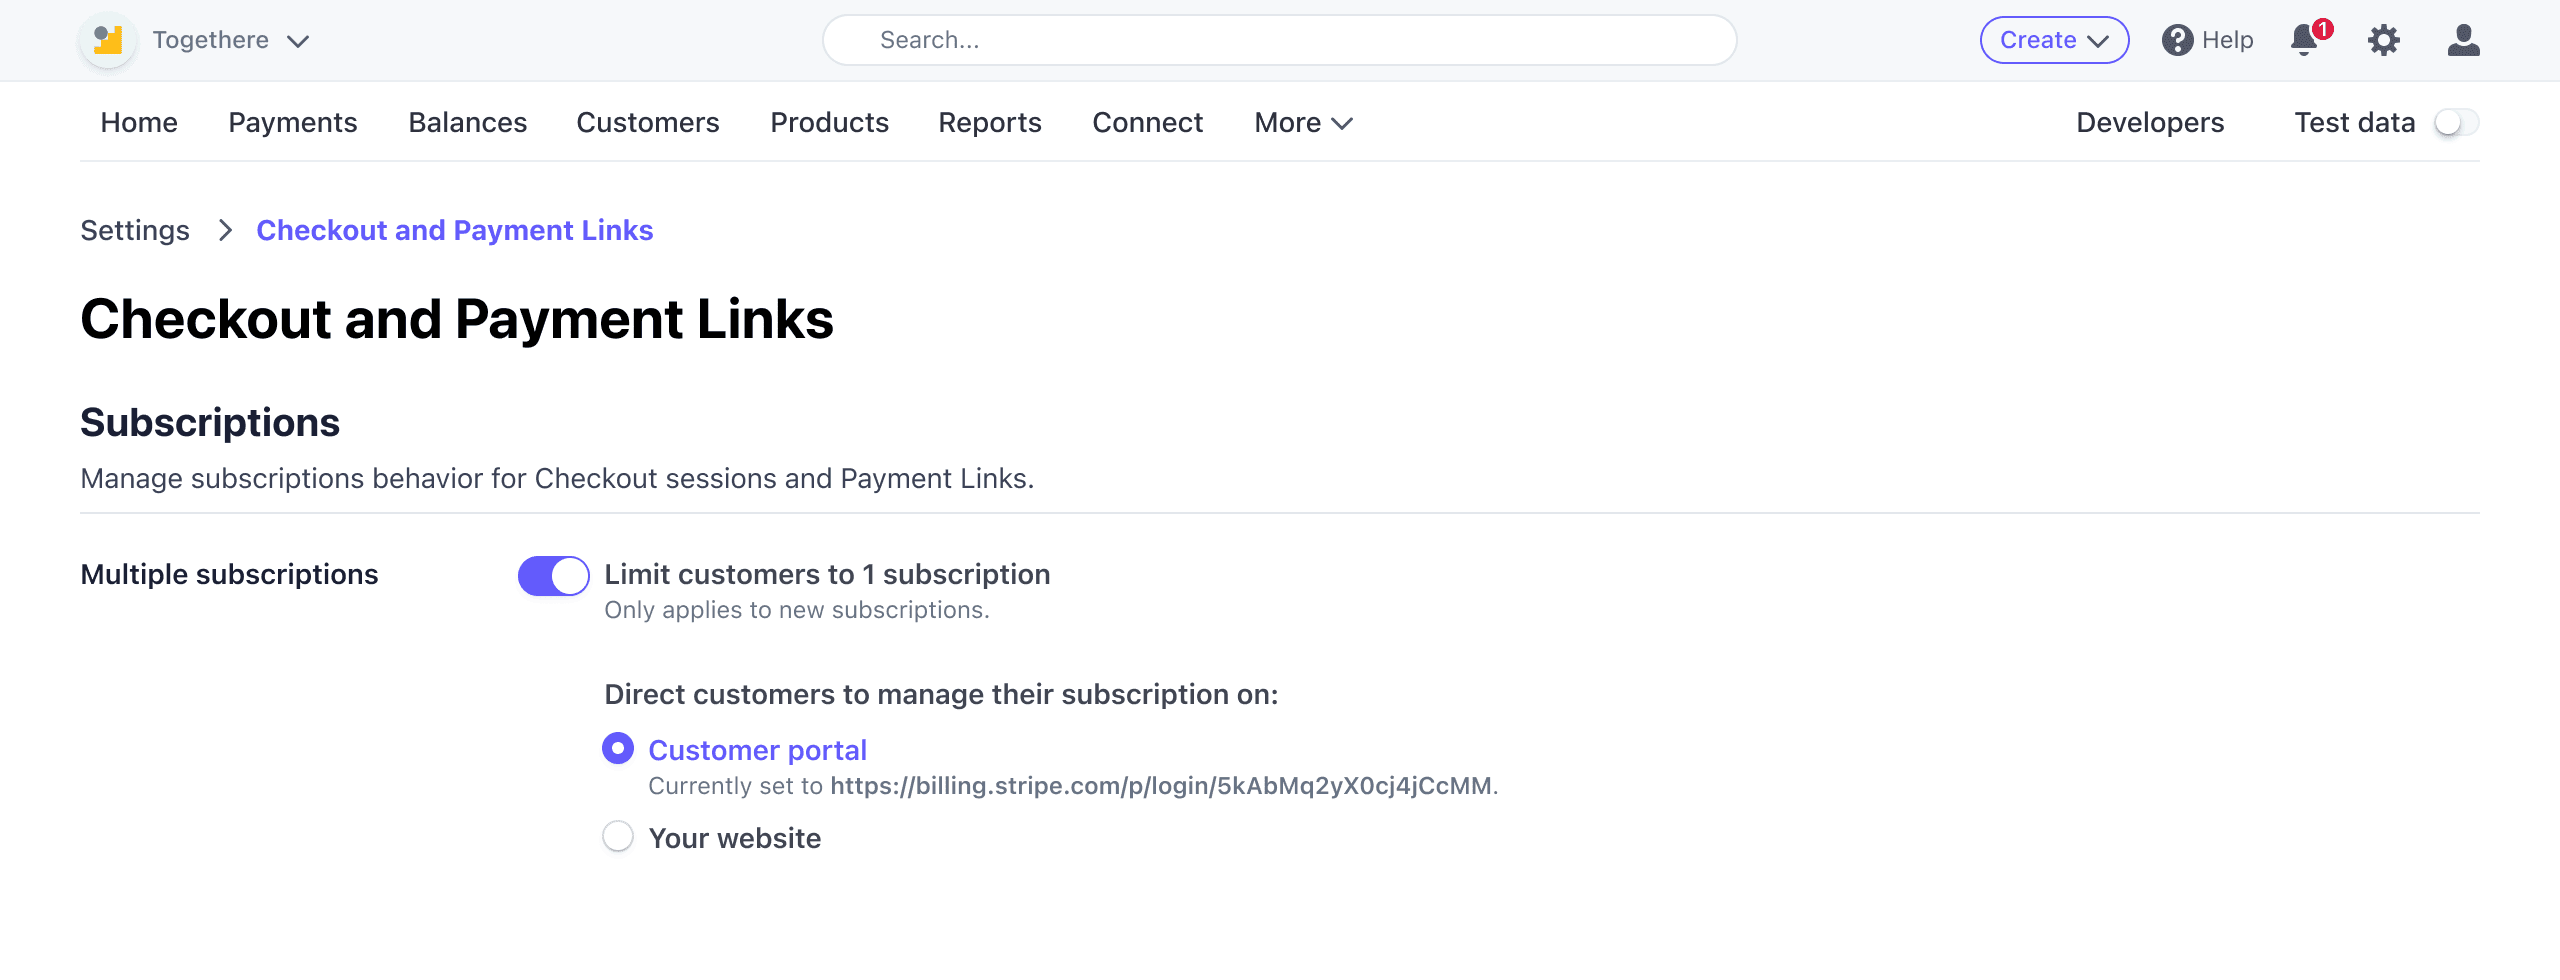
How to limit users to only one subscription?
You can enable Limit customers to 1 subscription in the Stripe Dashboard > Settings > Checkout and Payment Links > Subscriptions. You can find more information about Limit customers to one subscription in the Stripe documentation.